 |
| The Smoking Bulb |
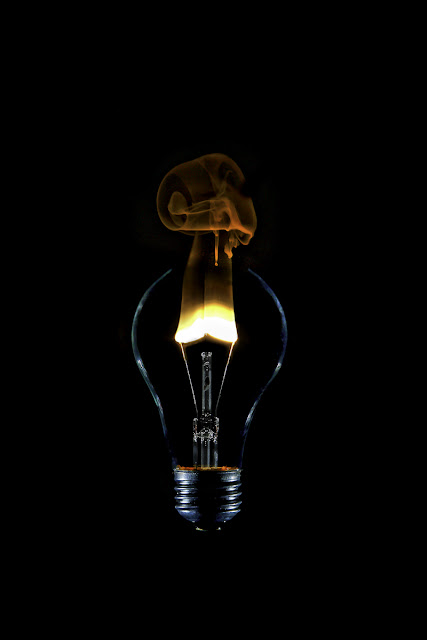
Earlier this week I posted this image to facebook and got lots of interest, and some questions on how it was done. This offered the perfect opportunity for a giveaway contest, something I've been wanting to do for a while on my facebook page! I'll get to the winners of the 16x20 print giveaway at the end of this post, but first I'm going to explain what went into the creation of this image.
I had a lot of fun conceptualizing, planning, shooting, and editing this image, and I am really happy with how the final turned out. I think it began with an image I saw on flickr of a broken light bulb going up in smoke, but it didn't have much artistic appeal to it and I didn't like the broken glass really. I wanted to create an image that seemed to defy what you knew about light bulbs, and one that was minimalistic but striking.
Your typical incandescent bulb works by flowing electricity through the filament, glowing to give off light. The bulbs are filled with an inert gas or evacuated, which prevents the hot filament from reacting with oxygen to combust. All I needed to do to get one to burn up was remove or break the glass to let the oxygen in. I bought half a dozen clear light bulbs from home depot as well as a work light. These lights are cheap, are easy to attach with the clamp, and allow you to remove the reflector dish to get just the bare bulb, exactly what I wanted.
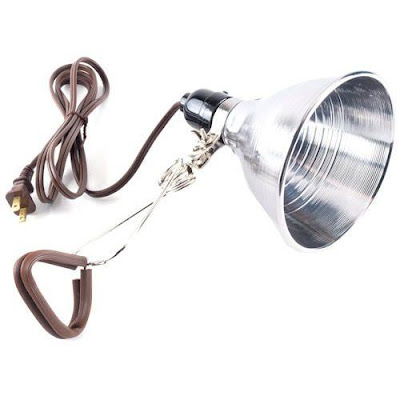 |
| 6" work light from home depot for $7 |
I quickly found out that breaking the glass on the bulb without breaking the thin filiament inside was not a trivial task. I tried several times to use a small hammer to break a small hole in the very top and each time the shattered glass took out the filament with it. I eventually used pliers near the base of the bulb, squeezing tightly on the glass, and got several successful bulbs with the glass removed. If you do this, put the bulb and pliers inside a plastic bag so all the glass is contained, it makes clean up a breeze. I kept one complete bulb to photograph as well.
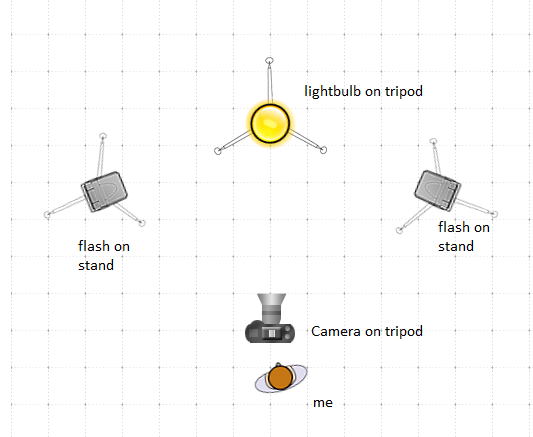 |
| Lighting diagram for the light bulb shots |
The lighting setup is straight forward. I used two bare flashes on lightstands and set each to manual power, so I could adjust after each shot. I zoomed the flash heads in to 105mm to avoid spill light anywhere else in the room and get that harsh light I wanted. I triggered them wirelessly using the pop up flash on my 7d.
The settings I started with on my camera were manual mode, 1/250 sec., f16, ISO 200, flash WB. I used my Canon 7d with the EF 24-105 f4L lens on it, zoomed all the way in to 105mm and manually focused on the bulb. Because the flash sync speed for my camera is 1/250, I could not go any higher than that for my shutter speed. These settings gave me a completely black room without any flash, which I wanted to get the black background. After I made sure I had the black background, I adjusted the flash power output to get the lighting on the bulb I wanted.
 |
| My "studio" - the sunroom in our house. (Iphone shot) |
I spent about half an hour photographing the complete, unbroken light bulb. I used double stick tape to hold the bulb in place on top of the tripod. After I was happy with the variety of shots and lighting in the images I captured of the complete bulb, it was time to move to the bare bulbs!
For this part, I turned off the flashes, as the flame from the burning filament is enough to light up the smoke. The combustion of the bare bulb filament takes only a few seconds, so I switched to high speed shutter mode, 8 frames per second. I plugged the work light into a power strip that had a on/off switch, and used a cable release to start shooting. As soon as I started shooting, I flipped the on/off switch on the power strip, and the bulb went up in smoke. Each bulb is worthless afterwards. I did three tries at it.
After going through all the images (I shot over 300!) I narrowed them down to 4 images that I thought would be the best to use to composite together for what I had in mind: bulb outline, bulb socket, bulb stem, and the flaming filament. The four images I started with are shown below.
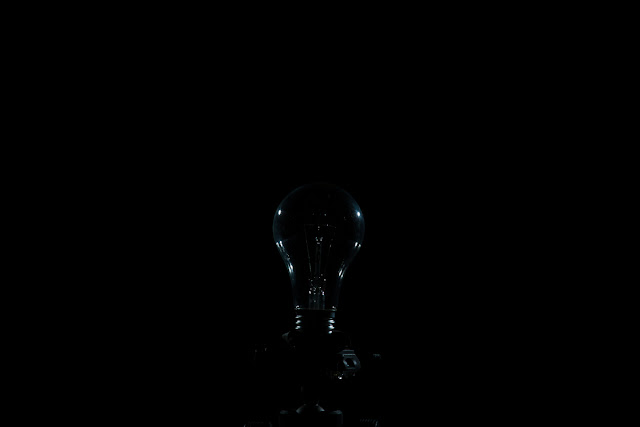 |
| The outer edge of the bulb |
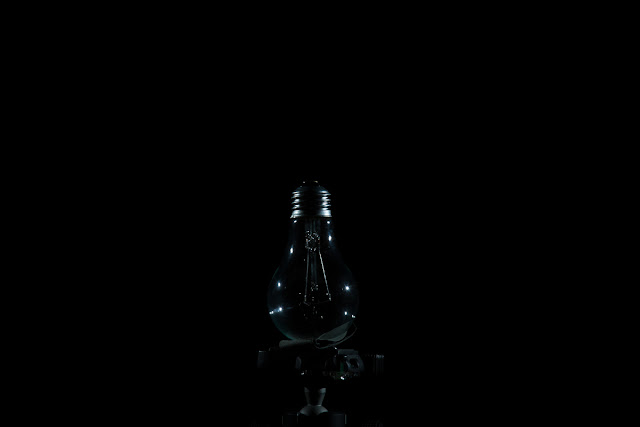 |
| I used this for the bottom socket, to replace the work light |
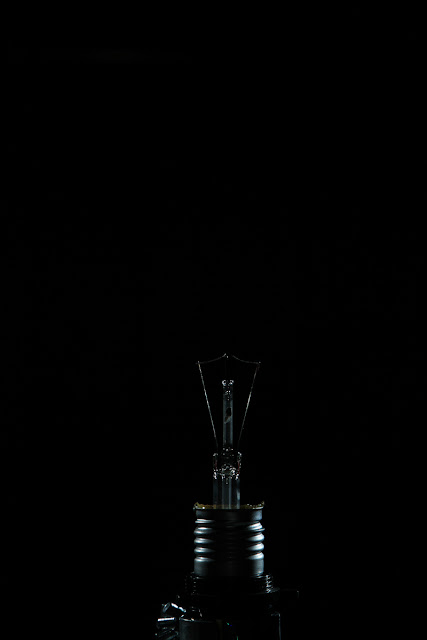 |
| I liked the inner stem on this one better than when it was lit from the flame |
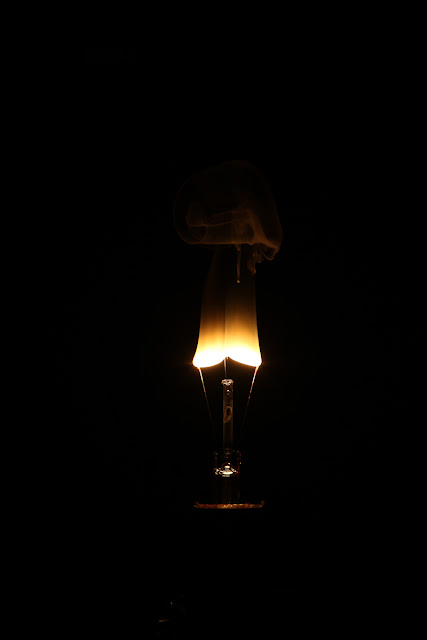 |
| And finally, the burning filament shot, with the smoke above |
After adding each of these into separate layers and lining them up, I added masks to hide the parts that I did not want. I had the composite shot I wanted, but it needed some tweaking to make it pop. I added additional layers to bring out the smoke, the detail in the glass and the socket, clean up the glass outline, and enhance the color of the glass, smoke and flame. I happened to use plugins I have for photoshop to do this (Nik Color Efex and Topax Adjust) but these things could have easily been done with adjustment layers in photoshop if I did not have those plugins. Finally, I did some cleanup to remove blemishes and cropped the image from horizontal to vertical.
 |
| The layers panel from photoshop once I finished the image. 13 layers total. |
|
So who won the contest to guess how this was done? There were lots of responses, and all of them were great! Some guessed a single image, with extensive photoshopping, others thought I used a candle to get the smoke, and hid it behind the light bulb. Several people guessed correctly that this was a composite of at least two images, it would have been very difficult, although not impossible (if I could successfully break a small hole in the top) to do it without multiple images. The gap in the top of the glass outline was achieved using the lighting setup at bulb height, 180 degrees apart and not a photoshop edit.
 |
| This animated shows the different layers used to create the image, from black background to completed image |
Sarah Kannenberg, Elaina Porter Janes, Kelly Gentz, and Jacob Rice all had great guesses that came really, really close, but the winner has to be Justin Vallely with this response:
I'm guessing you have multiple images layered on top of each other. At least 2 images.
Photo 1: Normal clear glass bulb, 2 flashes (1 on each side, 180 degrees apart). This provides the image for the glass and base. Photoshop might have been used to erase the glass at top dead center.
Photo 2: Same bulb with the glass broken/removed. Being exposed to oxygen now without the glass, the filament should burn when switched on. Base of the bulb in a fixture is photoshopped out, glass stem and burning filament are all that are left. No streaking and no "star bursts" so I'm guessing large aperture, quick shutter.
Congrats Justin, I'll email you details of how to order your print. Thanks to everyone for participating, I will definitely be doing another contest in the future, so stay tuned. Hope everyone enjoyed the detailed description of this image as much as I enjoyed creating it. Did I forget to cover something? Leave a comment and I'll address it.
Happy Shooting!


hi dear i use your image . any proble
ReplyDeleteNice blog! This is useful for those who is looking for the copper outdoor light fixtures. Keep Sharing such information blog.
ReplyDelete